Tuesday, 7 October 2014

MODULE THREE - CHAPTERS 1 AND 2


RESEARCH FOR SPIRALS - MAN-MADE AND NATURAL

I have always been fascinated by shells and fossils. I have quite a large collection of my own so I decided to concentrate my research in this area. The images below are of my own shell and fossil collection along with more from an  internet search.

1a
1b

1c


1d


1e
1f

1g

1h
1i


1j
1k
1L


Sketch book drawings and doodles inspired by my research images.

1m


1o
1p


1q
1r

1s
1t


1u
1v


 I think this is the first time I have felt confident about using my sketch book. I enjoyed drawing making these sketches and doodles. They have given me lots of ideas for further development. I have also started an A3 work folder to keep my work and show the progression from the research images and drawings to my two and three dimensional pieces of work.
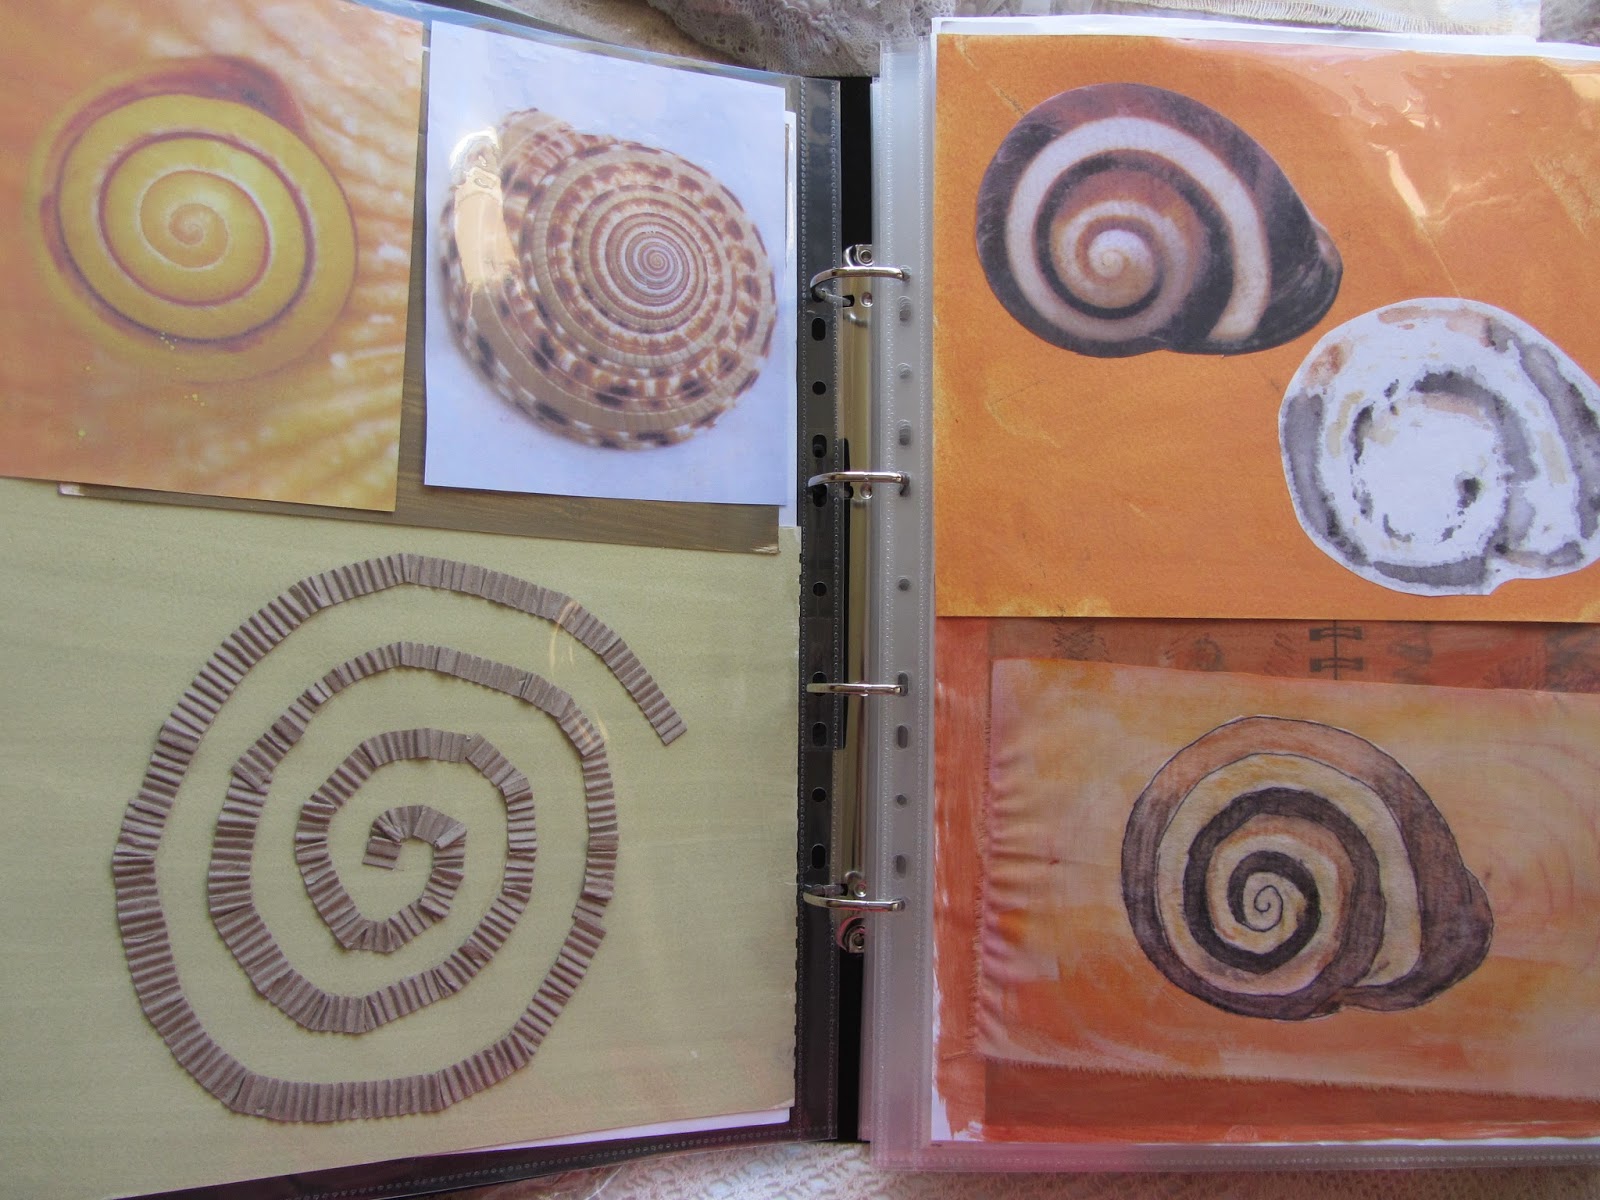
Below are some sample pages from my workbook.


Chapter Two

Colour choice:-
I have chosen the golden yellow of the spiral shell (1b) from the  photo image in Chapter 1 along with its complimentary colour violet. Whilst I was working on making my papers and before I made my final choice, I  expanded this colour scheme to include shades, tints and tones for both colours, analogous colours and some of their split complimentary colours. A small selection of my papers is shown below. (The purples in the photos look more blue in these images than they are.)


My two dimensional shapes showing the progress from an initial image:-

2a -  a spiral made from corrugated card


2b - a spiral shell image (1e) painted on fabric and its 'ghost image' on paper from under the fabric


2c - two conical shell spiral images (1g and 1i), mounted on a painted paper background; then traced on Lutrador, coloured and cut out, finally the negative images in Lutrador mounted on a painted paper 


2d - a spiral doodle from my sketch book with a simplified image made from coloured and twisted paper napkins


2e - as above but from doodle (1r)


2f - my spiral tree sketch (1q) with the 2d image made from corrugated card and spiral cords of parcel string.


This shell and two of my ammonite fossils were the inspiration for most of the work below, images 2g - 2q


2g -  a spiral made from paperclips 


2h - spirals made from folded cartridge paper


2i - a double spiral made from parcel string 


2j - a large spiral from parcel string and some coloured papers printed with this design


2k - a large spiral made from plastic curtain hooks, I love this, a spiral made from smaller spirals!!


2l - another smaller curtain hook spiral


2m - A large paper clip spiral


2n and 2o - two images 0f spirals made from the trimmed paper edges of pages torn from a spiral bound sketch pad.


2p and 2q - twisted lengths of dyed scrim made into spirals


Simple three dimensional shapes

2r and 2s - corrugated card spirals, on a background made by tearing strips from the top layer of three ply cardboard


2t and 2u - a large destructed tube from a kitchen paper roll. I love this spiral sculpture, I sure I could use this idea later!


2v - small tube with a spiral design made from corrugated card strips then used to print a design


2w - a spiral made from a waste strip of folded cartridge paper


2x -  a corrugated card spiral


My spiral designs using mono printing


Spiral design printed from a crochet spiral


I have enjoyed working through this chapter, I discovered that there were many ways to develop and expand my initial images and drawings. These ideas are just a few that came to mind. Now I am eager to start some fabric dying for the next Chapter. I tried but did not enjoy using the drawing programme on my computer so decided to leave that section.

Friday, 11 July 2014

Images of work for Module 2


Hello Sian,
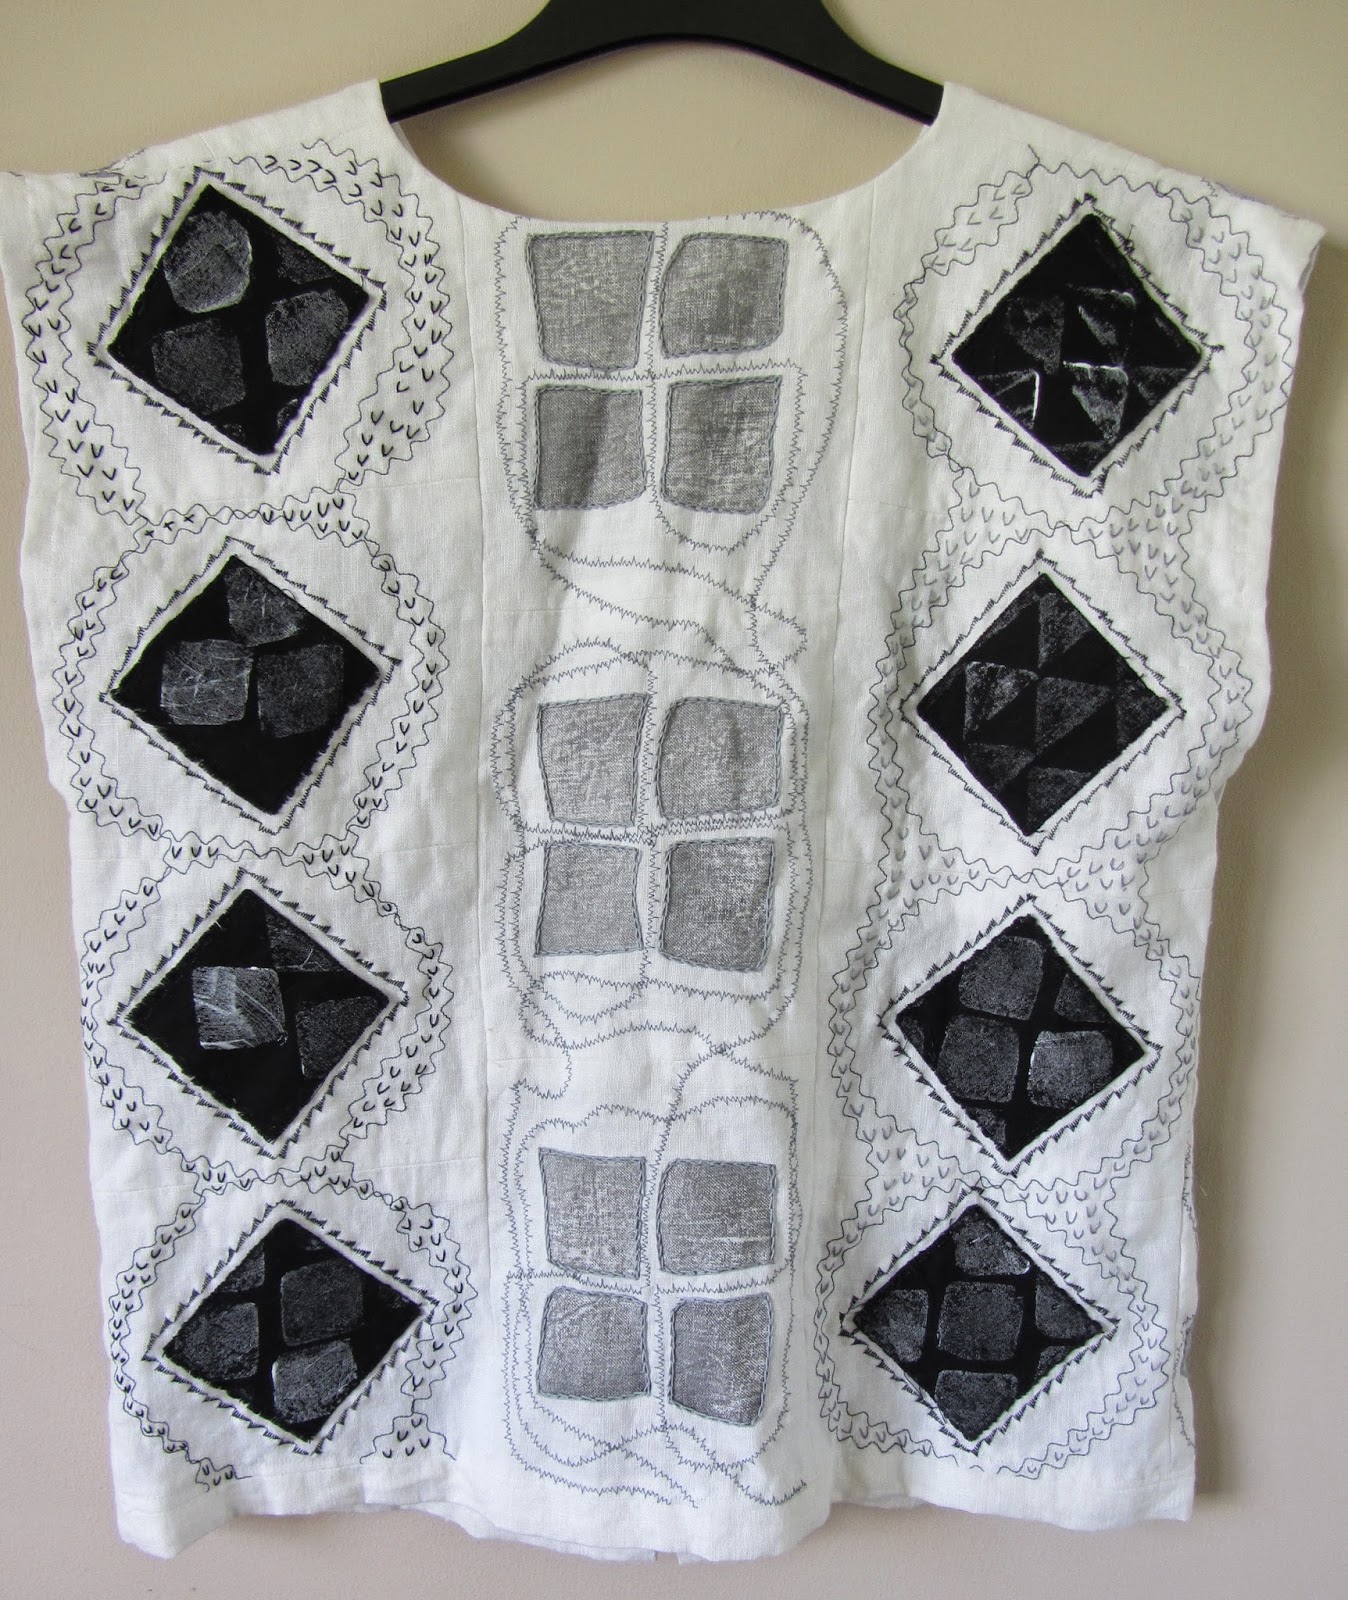
. Below are the images of the pieces I left behind!! I have included the front, back and stitch details for both garments. The patchwork waistcoat was my first piece but I thought the purchased fabrics were not my individual work so I started again with plain off white linen. This whole garment has been block printed, machine and hand stitched with my own work. 

This linen tunic, it is very comfortable and easy to wear. The design is very simple with three columns stitched together for the back and four for the font. It opens with a zip. The applique patches were printed before being stitched on the garment.  I wish now that I had dyed some of the linen,using the methods learn in this module, before making and decorating the garment.


Details of hand and machine stitching inspired by snake skin markings.


My patchwork waistcoat with hand embroidered applique patches stitched onto a patchwork background. This garment is lined. I like the tonal effects with dark to light from  bottom to top on the background patch work and the reverse on the appliqued patches.


Details of the hand stitching on the frayed edge applique patches.


I did bring the receipts detailing  the cost of the materials I purchased for this module. I put them in a safe place but now can't find them! When they turn up I will send them. I look forward to your feedback. Regards Lorna

Thursday, 26 June 2014

CHAPTER 13 ARTIST STUDY AND EVALUATION

Hans Holbein, holbein stitch and blackwork embroidery.

Holbein stitch derives its name from the 16th century German painter Hans Holbein the Younger. He is famous for his portraits of Henry VIII and his court. Holbein stitch is a running stitch made with gaps between the stitches. The gaps are filled on the return journey so that the stitching looks the same on the front and back. The stitches are usually worked on even weave or counted thread fabrics.
Blackwork embroidery is traditionally worked with a black thread on a white background. The tiny straight stitches are worked across counted threads to make many intricate patterns. It was originally known as Spanish work because it is believed Catherine of Aragon, the first wife of Henry VIII, brought garments from Spain decorated with this type of embroidery. 

The two images below show examples of blackwork taken from portraits by Hans Holbein the Younger. The first is the cuff on the dress of Anne Seymour and the second a sleeve on the garment worn by Elizabeth I


Bridget Riley was born in 1931, she studied art at Goldsmiths College and the Royal College of Art. She is best known for a style of painting known as optical art. She began painting in this way during early 1960's. At first her paintings were just black and white geometric shapes that produced optical effects and the feeling of movement. Later she introduced tones of grey.
The painting below is called 'Movement in Squares' and was completed in 1961. Here the squares change gradually to rectangles giving the optical illusion of movement into a ravine.


This painting is called 'Cataract 3' and was completed in 1967 and she has added tones of grey. Here diagonal wavy lines in black, white and grey give the illusion of wave movement on water.


We used similar 'op-art' techniques when 'piecing' paper and fabrics in Chapters 10 and 11 of this module.


I have chosen Iska Jarnica as my artist. She was born in Poland in 1957, studied Fine Arts  at Krakow and now lives in Holland. She is known for her incredible paintings and tapestries. In many of her pieces she only uses tones of black, white and grey. I love the wonderful atmosphere she creates in her tonal pieces. 
We explored tone in drawing, stitching, piecing paper and fabric in this Module.  
The illustrations below of work by Iska Jarnica all demonstrate her use of tone to give  wonderful feelings of time and place.


Evaluation of Functional 3D Embroidered items

My assessment piece is an off white  linen tunic based on several design topics taken from this module. Snake skin markings are the inspiration for the patterns, particularly the diamond markings evident in many of the photo images I found. It is a patchwork tunic pieced together from  linen squares that have been individually embellished with fabric printing, machine stitching and hand embroidery. Tone is introduced with black fading through grey to white. The design is very simple. The squares are stitched into columns. There are three columns to make the back and two columns for each of the fronts. These columns are embellished with sinuous lines of machine stitching and hand embroidery to give the feeling of  snake movement. It has a simple round neckline with a facing.  

How do you feel about the resulting conclusion?

I learnt many lessons in the designing and making of this tunic. The design went through many revisions, including a 'pilot version' that I completed. However I decided that the purchased fabrics in this pilot version  did not give the individual look I wanted. Designing is a road of frustrations, disappointments and successes!  I am happy with my final garment.

Is it fit for its purpose - give reasons:

The tunic is definitely fit for purpose. It is comfortable to wear and has an individual look. The finished garment has been washed with no damage to the embellishments and embroidery. 

If you were asked to make it again, what changes would you make in the the way you designed it and made it?

I would have dyed the linen fabric, using one of the shibori methods, before making the garment.


Comments:

I have not included photos of my finished pieces because I will bring them to Summer School for your assessment. See you soon! Lorna


Monday, 21 April 2014

CHAPTER 12 REVISIONS


I have continued with all three of my ideas and made several revisions following your recent feedback. I will decide later which one to use as my final sample for Chapter 12. I like to follow through my ideas,evolving the design, making changes, until I am 'just about' satisfied with the result, no plastic bags of unfinished work!!! For all the design ideas I have tried to keep in mind the brief for a functional, three dimensional embroidered item. This item should have richly patterned and stitched surfaces and be imaginative, creative and unconventional.

Idea 1 - the embroidered and embellished linen tunic inspired by snake skin patterns. Firstly I changed the basic design making it much simpler with just strips of embroidered linen squares to make a kimono style tunic. The two images below show the revised pattern and some of the partly embellished linen squares. There are three joined squares in the panels below. I have a lot more work to do here but at the moment I feel that this tunic has the potential to be the design that full fills the brief most fully.


Idea 2 - my bag inspired by cat skin patterns and colours with  hand dyed and printed fabrics, patchwork piecing, machine embroidery and quilting to give a textured surface. The design is the same as the small bag in the first section of this chapter. The image below shows the just about completed bag. I might add further hand stitching? 
My thoughts:-
I feel that this design is very functional and decorative but it is a little too conventional. I like the hand dyed and printed fabrics but the stitching, although indicating snake skin patterns, is too regular.


Idea 3- my tonal waistcoat with a patchwork background and hand stitched embellishment. This design evolved slowly as I worked. I purchased the fabrics because of their good tonal qualities  even though the patterns were not  inspired by animal markings. I therefore needed to make the design creative and unconventional but with influences from animal markings. I have added frayed edge patches to the background patchwork and these have been hand embroidered with sinuous lines and 'V' shaped stitching to indicate snake movements and snake skin patterns. I have also made triangular sections for the bottom of the garment to indicate a snake's head? I will add more hand embroidery and possibly some fringing. 

My thoughts:-
I think this design will make an unusual, decorative and functional garment that I will wear. But I am not sure that the fabrics choice was the right one to full fill all of the brief objectives. If I started again I would dye and print the fabrics to give a more snake skin pattern influence and individuality to the design.